Upside - A Lost PUPs Production
A film about finding light in unexpected places
LIGHTING & COMPOSITING
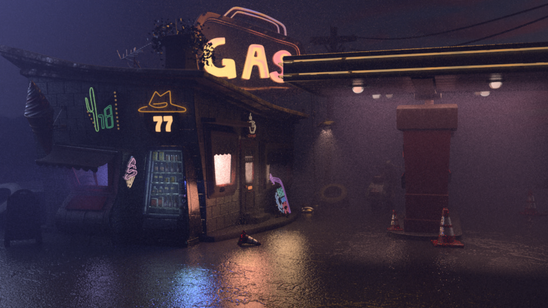
Lighting was my main role on the film. Considering the fact that the story we were telling was all about light, I was definitely super excited to tackle this portion of the pipeline! These are a couple stills from my shots + the color scripts that I used for reference (illustrated by Anne Chen).
The Lighting Process: several iterations later...
This gas station scene was by far the most difficult thing I have ever tried to light. With so many elements to consider--fog, rain, dusk sky, neon lights, volumetric lights, multiple colors clashing---It took me several different experimental iterations before I reached the outcome that I was happy with!
Gas Station Scene | Part 1 - Lighting
Following Anne's color scripts was a super fun process! I quickly realized how much the shaders affected the scene after initial lighting had been placed, so I adjusted and tweaked the temperatures and roughness back and forth between lighting to get the colors to match the way I wanted.
My Initial passes were definitely too dark overall, and I had random bursts of hotspots within the frame that were quite chaotic to look at. Receiving paint-over feedback from Miguel Zozaya was really helpful in terms of understanding that our eyes are drawn to areas of high contrast, and Eman Abdul-Razzak suggested that I add more warm light bleed across the sides of the convenience store.

Incremental frame renders to visualize the entire shot with camera movement + lighting
.png)
.png)
.png)
.png)
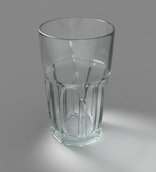
Shading + Lighting References for rain puddles on asphalt
About 85% into completing the lighting for this scene, I still felt like the wetness of the ground didn't sit right/resembled plastic a bit too much. To solve this, I tried changing values in specular and diffuse roughness but it did not seem to do anything. I was able to finally solve this issue by changing the IOR settings within the glass subsection to 1.33 (water), that alternated with the roughness map, and then decreased the specular contribution on the lights casting onto the water so that the colorful highlights wouldn't be too bright and in your face.
.jpg)

Puddle Shader (Before + After)
The biggest challenge during compositing was creating the rain effect. I spent so much time scouring the internet for different ways to use particle effect nodes, or importing houdini sims into nuke in order to do this. Turns out there was a P_RainSnow node the whole time that I didn't even know about! This made my workflow much easier and I was able to adjust the scale, translate and speed settings to achieve the size and velocity of the rain particles for a drizzle. The shot's animated camera was imported as an .abc file to get the correct tracking in.
Gas Station Scene | Part 2 - Compositing

Gas Station Scene - Nuke Tree
Attic Scene | Part 1 - Lighting

This was my first time ever using volumetrics in Renderman. I had followed a tutorial on youtube to create the image on the left, but clearly had no idea what I was doing :')
I reached out to my lighting mentor, Eman, who gave me a lot of suggestions on how to go about using volume boxes in Renderman. Turns out the method I was using by using adding volume shaders to modeled geometry was only used for things like clouds! This process was really helpful in understanding how to move forward in lighting the scene with more clarity and subtleties.
The slideshow below is a series of the development of lighting this scene:
Work in Progress Test Renders
I really wanted to light this shot because I had a VERY strong vision in mind for how I wanted the colorful glow to look. I looked up a bunch of tutorials on caustics, and render settings etc. but the refracted lights were still too weak and barely hit the objects around it. I thought: wouldn't it be nice if the lamp's glass section was just closer to the ground?? So I decided to do exactly that, duplicate the lamp and angle it so that it would cast its light directly onto the wooden surface! (This took several different trial and error attempts)

.png)
Primary Visibility On
Primary Visibility Off
Cheating the Lamp Caustic Effect
The next problem I faced was to do with volumetric mesh lights causing crazy render-noise and hazy spots like the image below. Mesh lights do not have the contribution attribute in Renderman, so I did not know how to turn off the volume. After some troubleshooting, I realized that if I turn off the volume shader in the light linking window it does the exact same thing! From this, I also learnt a lot about how to use light linking to my advantage in terms of being selective about which objects receive the lights I place (super useful for defining edges with specular rim lights and not making the scene too muggy from all the volume).
.png)
The Power of Light Linking

Animating the Light throughout the Sequence
Attic Scene | Part 2 - Compositing
For the compositing portion and final touches, I had 2 main goals in mind. 1. grading the window to have a ramp that goes from white to blue to mimic a moonlight better. (earlier feedback said that my scene looked too much like morning light). To do this most effectively, I rendered out a separate pass of the full sequence, assigning two aiFlat shaders (black and white) so that I'd have just the cutout of the window to use as a mask for compositing. 2. adding subtle dusk flecks to add more dynamic realism and add to the old/dusty quality of the attic. This was achieved by importing the camera as an .abc into nuke and using particle generators to drive a series of .tiff images that I quickly made in photoshop as the dust variations!

Attic Scene - Nuke Tree

Dust particles created in photoshop

aiFlat pass for window alpha mask
SURFACING
I was also really keen on learning more about procedural texturing in Renderman, so I volunteered to texture and shade a lot of the smaller assets needed to fill up the environments in the scenes! Following lots of tutorials and asking the vets for feedback, I was able to learn a lot about building the look development of props in terms of storytelling, as well as getting used to using proceduralism to my advantage to optimize the amount of texture maps needed!


